> ## Documentation Index
> Fetch the complete documentation index at: https://docs.smartsend.io/llms.txt
> Use this file to discover all available pages before exploring further.
# Connection
> Connect your WooCommerce store to your Smart Send account
After installing the Smart Send plugin, you need to connect it to your Smart Send account using your API token.
## Connect to Smart Send
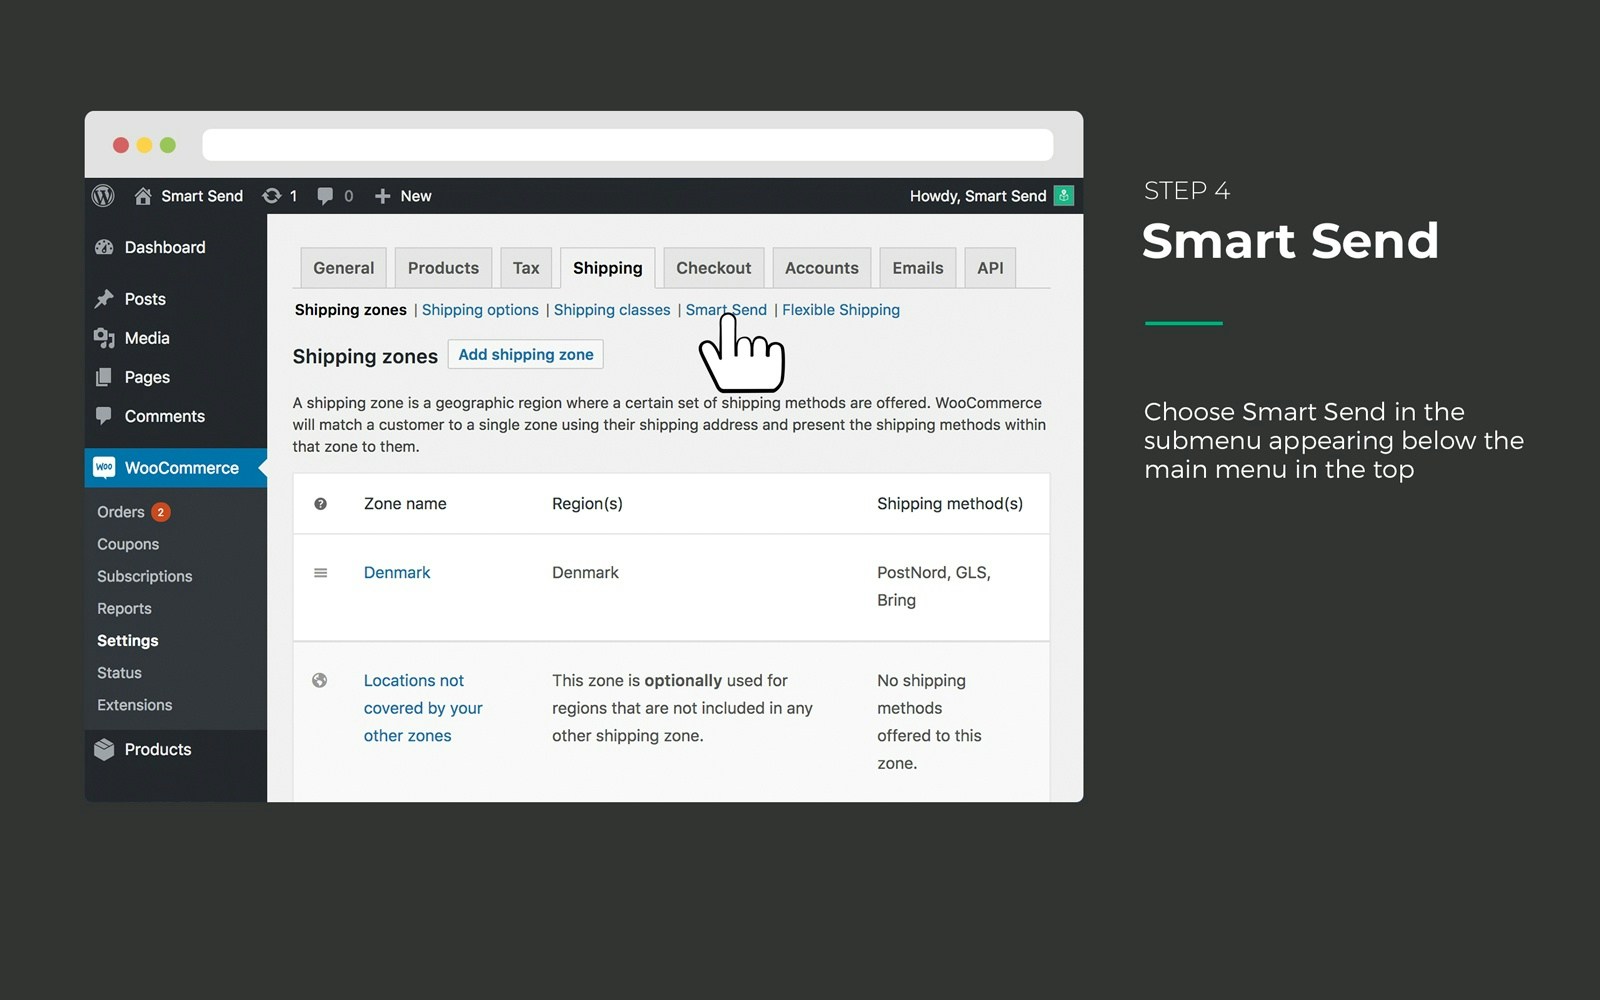
1. **Navigate to Smart Send settings**
Go to **WooCommerce** > **Shipping** and click on **Smart Send** in the submenu.
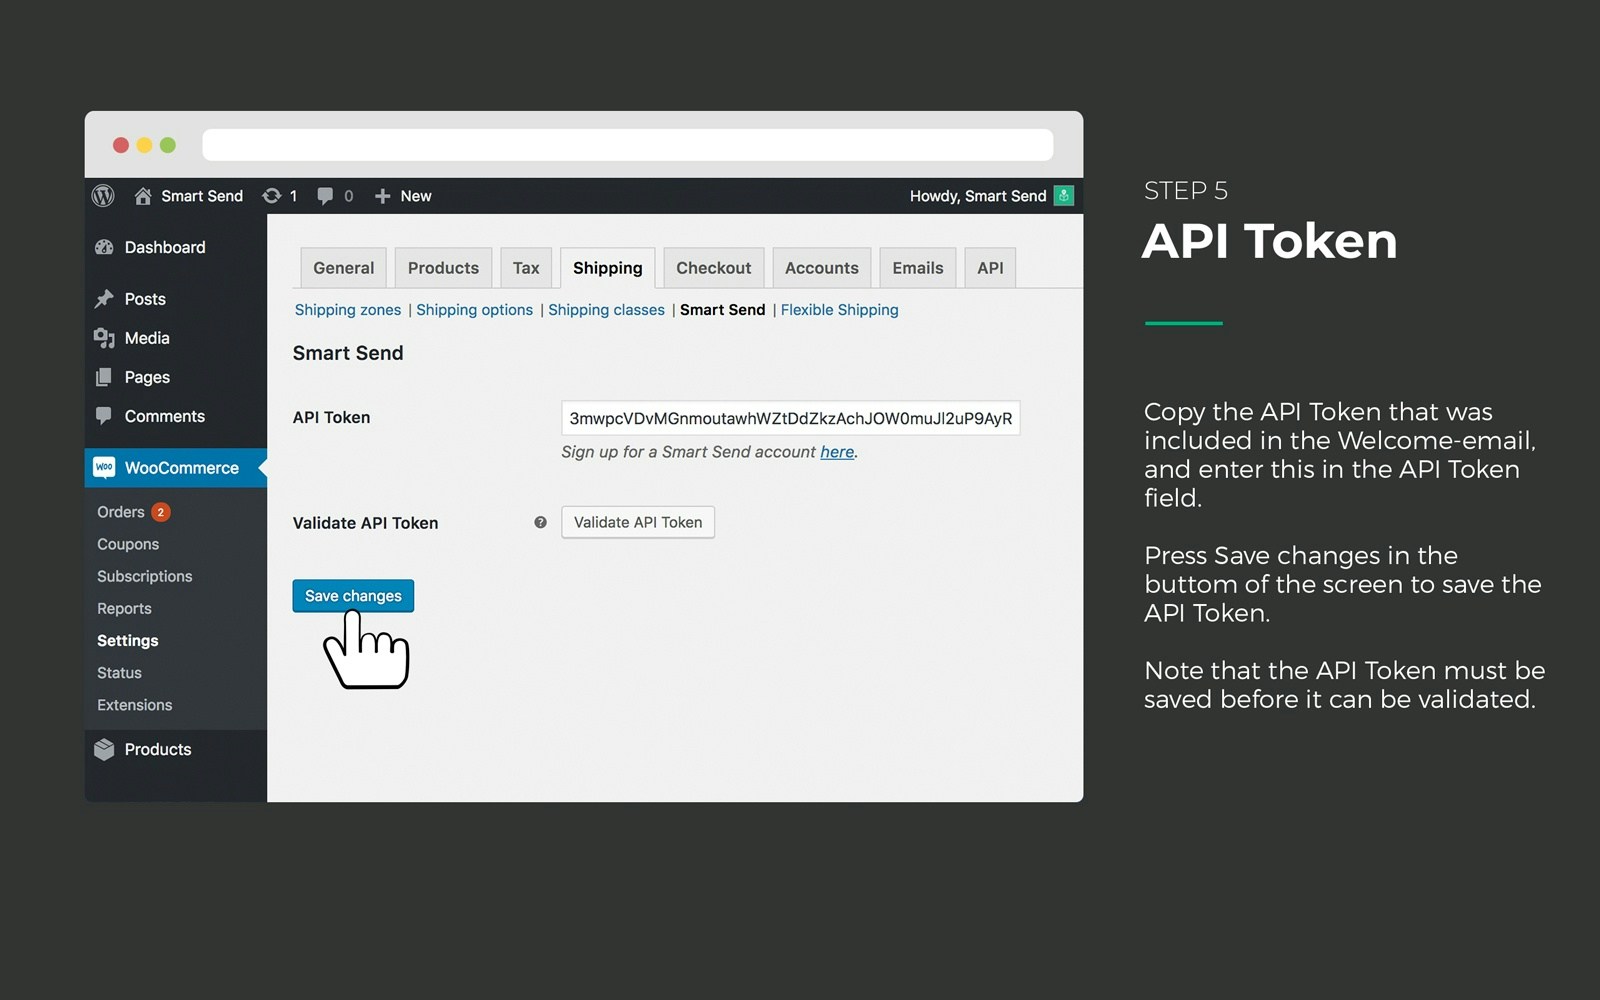
2. **Enter your API token**
In the Smart Send settings page, enter the API token you received when creating your Smart Send account.
If you don't have a Smart Send account yet, you can create one here.
3. **Save your settings**
Click **Save changes** before validating the API token.
You must save the settings before validating the API token, or the validation will fail.
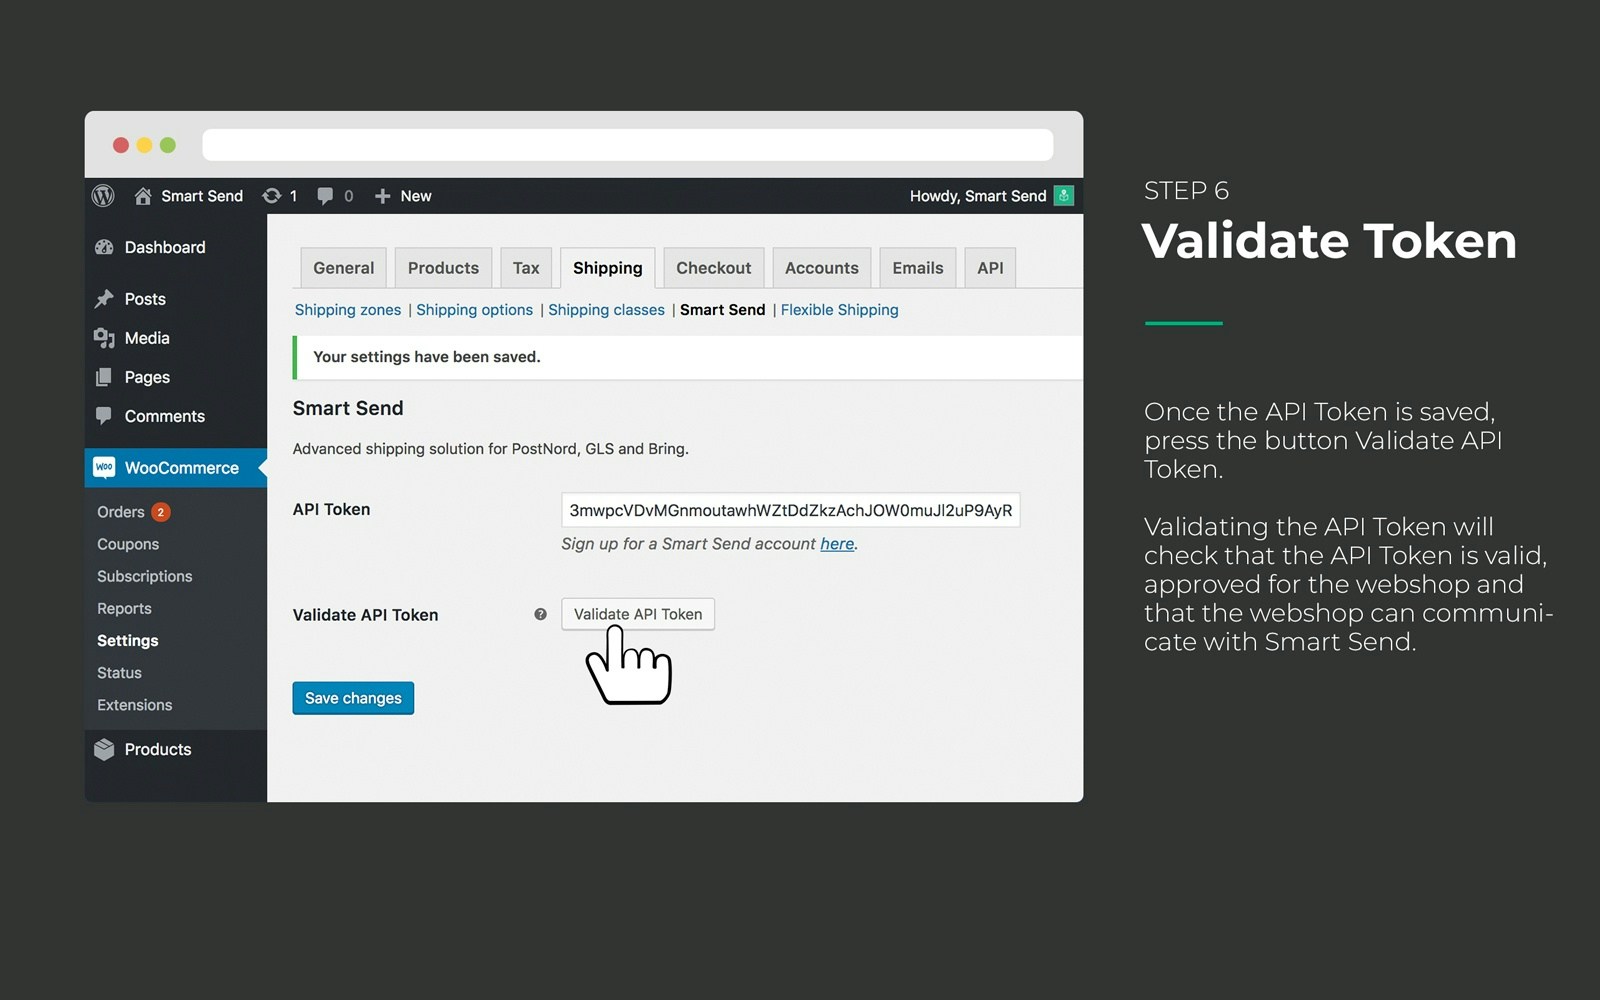
4. **Validate the API token**
After saving, click **Validate API Token** to test the connection.
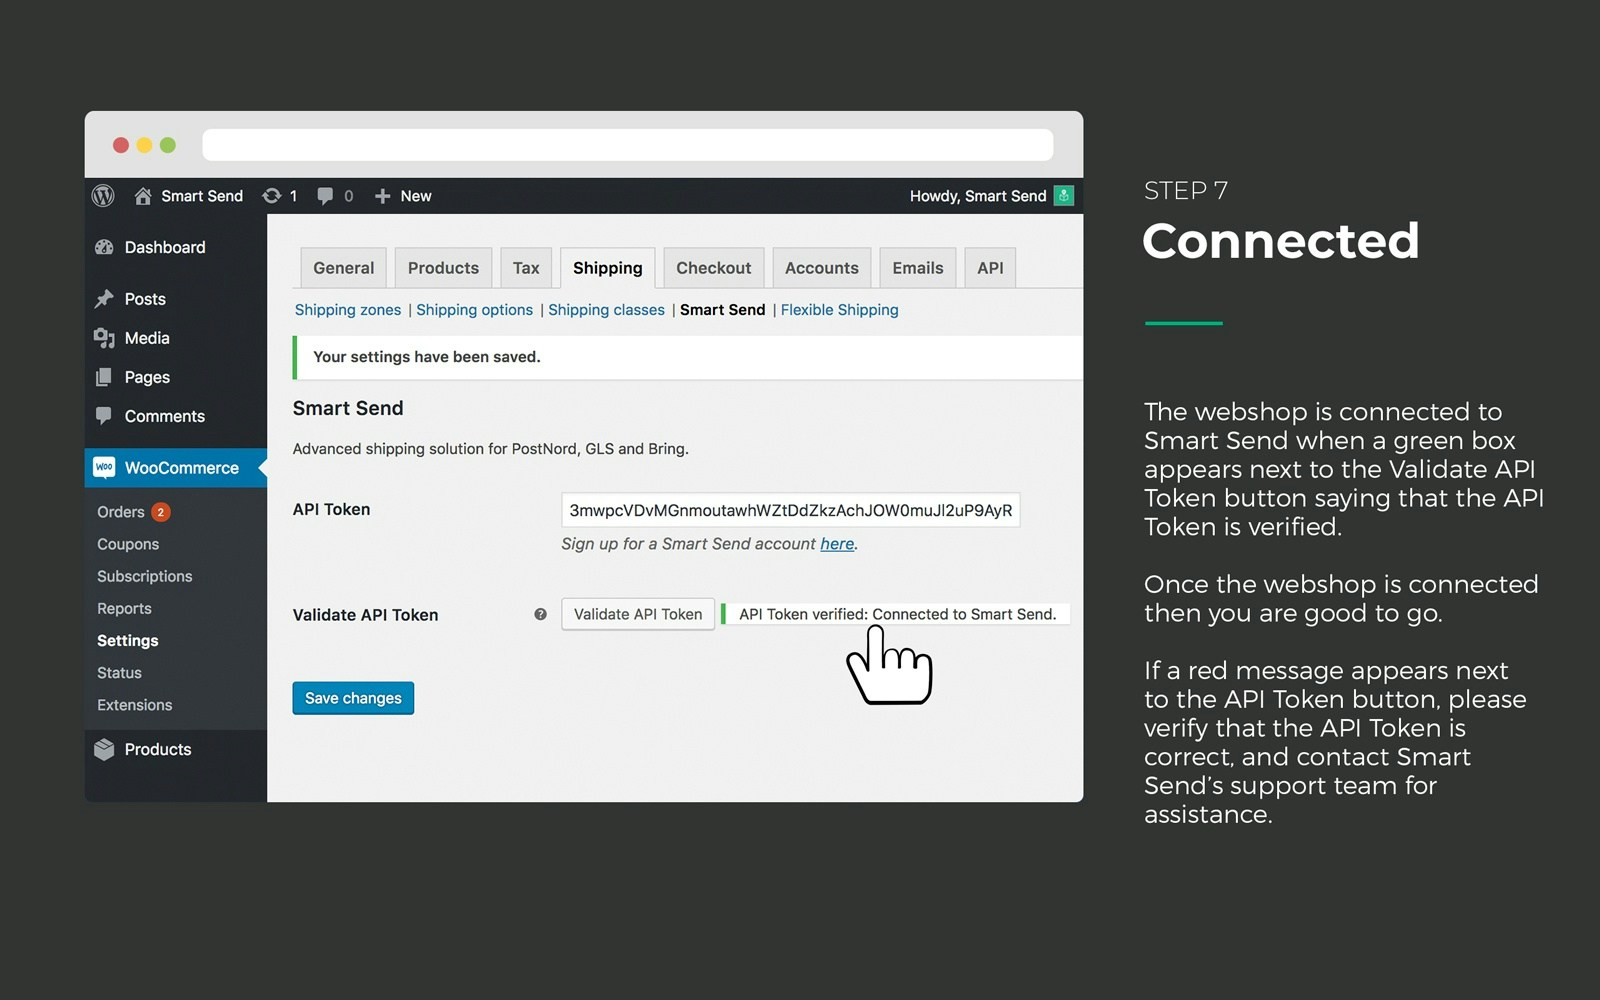
5. **Confirm successful connection**
When the API token is accepted, you'll see a green message: "API Token verified".
## Troubleshooting connection issues
### Common errors
**Red error message appears:**
* **Forgot to save settings** - Make sure you clicked "Save changes" before validating
* **Wrong website URL** - Ensure the registered URL in Smart Send matches your store's URL exactly
* **Invalid API token** - Verify you're using the correct token from your Smart Send account
URLs like `smartsend.io` and `smartsend.dk` are considered different URLs. Make sure the registered URL in your Smart Send account matches your store's domain exactly.
### Getting your API token
If you need to find or create a new API token, start by logging into the Smart Send platform .
Go to **Settings** > **API tokens**
**Create a new token** or copy an existing one
**Use the token** in your WooCommerce settings
## Next steps
Once successfully connected:
1. [Configure your shipping methods](/integrations/woocommerce/shipping-methods)
2. [Set up pickup points](/integrations/woocommerce/pickup-points) (optional)
Your WooCommerce store is now connected to Smart Send and ready for configuration.
 2. **Enter your API token**
In the Smart Send settings page, enter the API token you received when creating your Smart Send account.
2. **Enter your API token**
In the Smart Send settings page, enter the API token you received when creating your Smart Send account.
 3. **Save your settings**
Click **Save changes** before validating the API token.
3. **Save your settings**
Click **Save changes** before validating the API token.
 5. **Confirm successful connection**
When the API token is accepted, you'll see a green message: "API Token verified".
5. **Confirm successful connection**
When the API token is accepted, you'll see a green message: "API Token verified".
 ## Troubleshooting connection issues
### Common errors
**Red error message appears:**
* **Forgot to save settings** - Make sure you clicked "Save changes" before validating
* **Wrong website URL** - Ensure the registered URL in Smart Send matches your store's URL exactly
* **Invalid API token** - Verify you're using the correct token from your Smart Send account
## Troubleshooting connection issues
### Common errors
**Red error message appears:**
* **Forgot to save settings** - Make sure you clicked "Save changes" before validating
* **Wrong website URL** - Ensure the registered URL in Smart Send matches your store's URL exactly
* **Invalid API token** - Verify you're using the correct token from your Smart Send account