

Printing directly to a Zebra Link-OS printer requires a paid plan. See our pricing page for details.
Before you begin
- Load the printer with labels and switch it on.
- Connect the printer to the internet, by network cable or Wi-Fi. To put a printer on Wi-Fi, see Connect to Wi-Fi in the Zebra printer setup guide.
- Decide whether you set the printer up from a phone or from a computer. A phone talks to the printer over Bluetooth. A computer must be on the same network as the printer.
print.smartsend.io on port 443. Most networks allow this without any changes.
Add the printer
To add a printer, start by logging into the Smart Send platform .1
Start the setup
Go to Settings → Print settings and click Add Zebra Link-OS printer.A dialog opens and waits for the printer. The setup expires after 15 minutes, and closing the dialog cancels it. If that happens, start again.
2
Send the setup to the printer
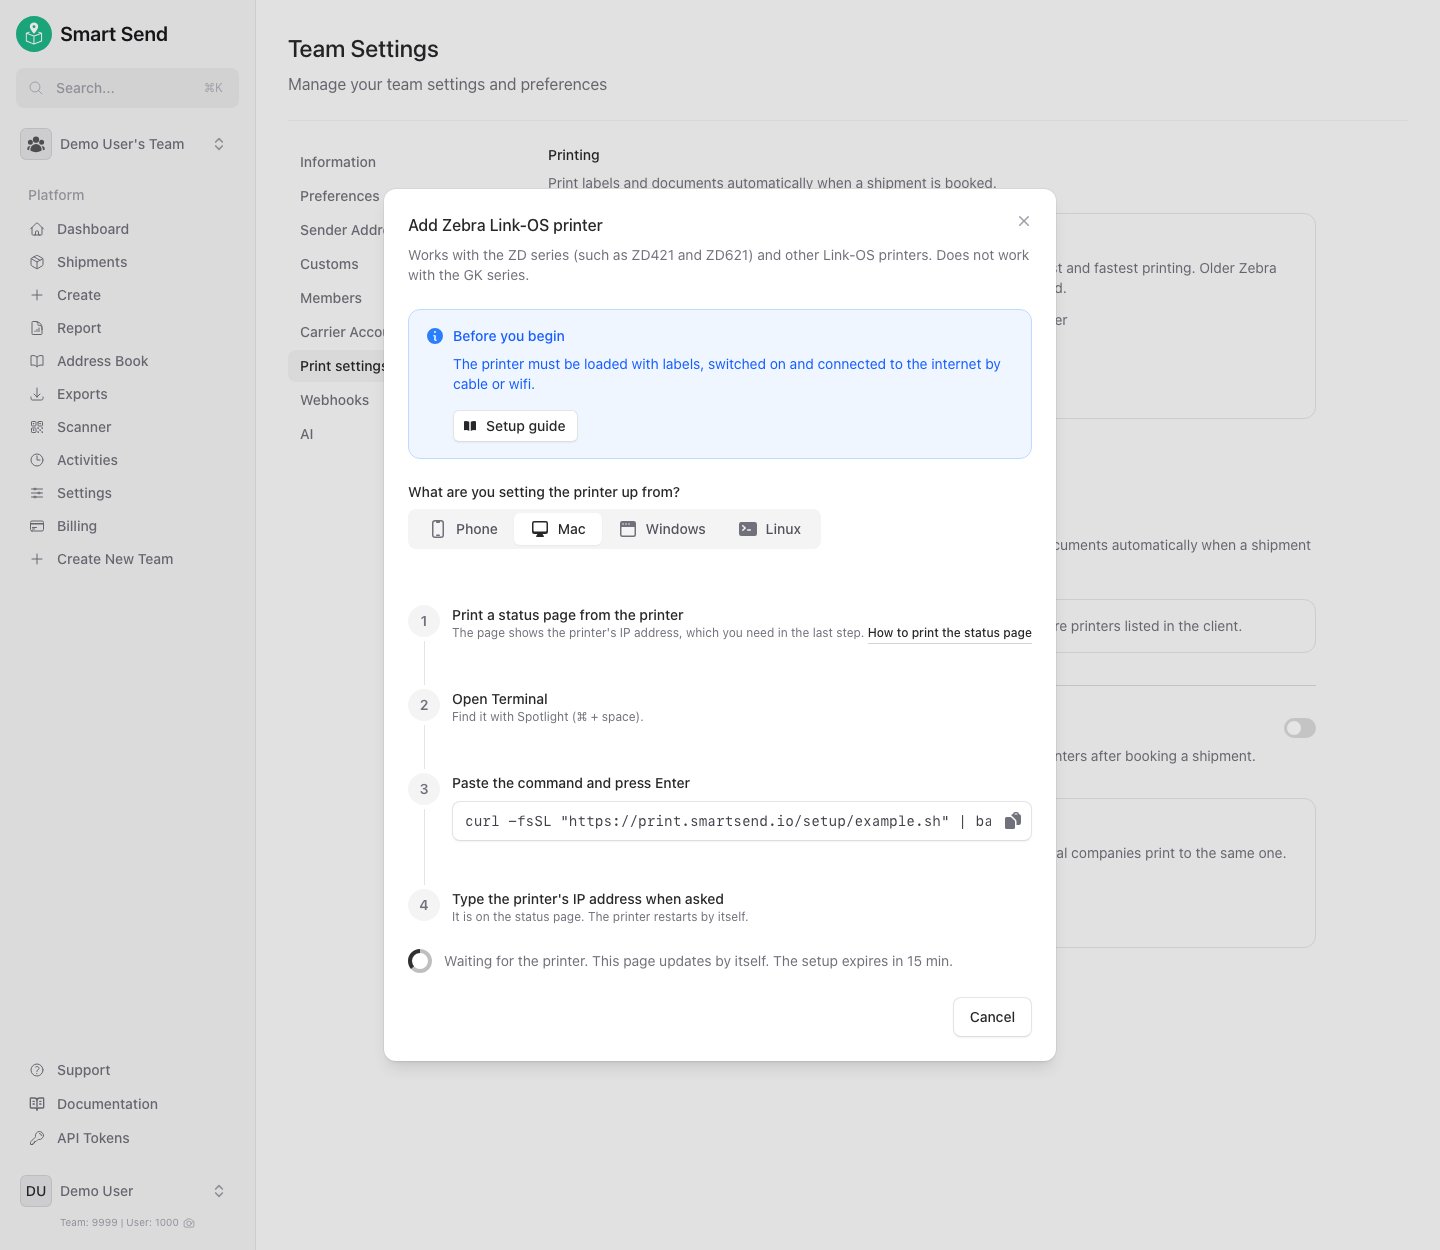
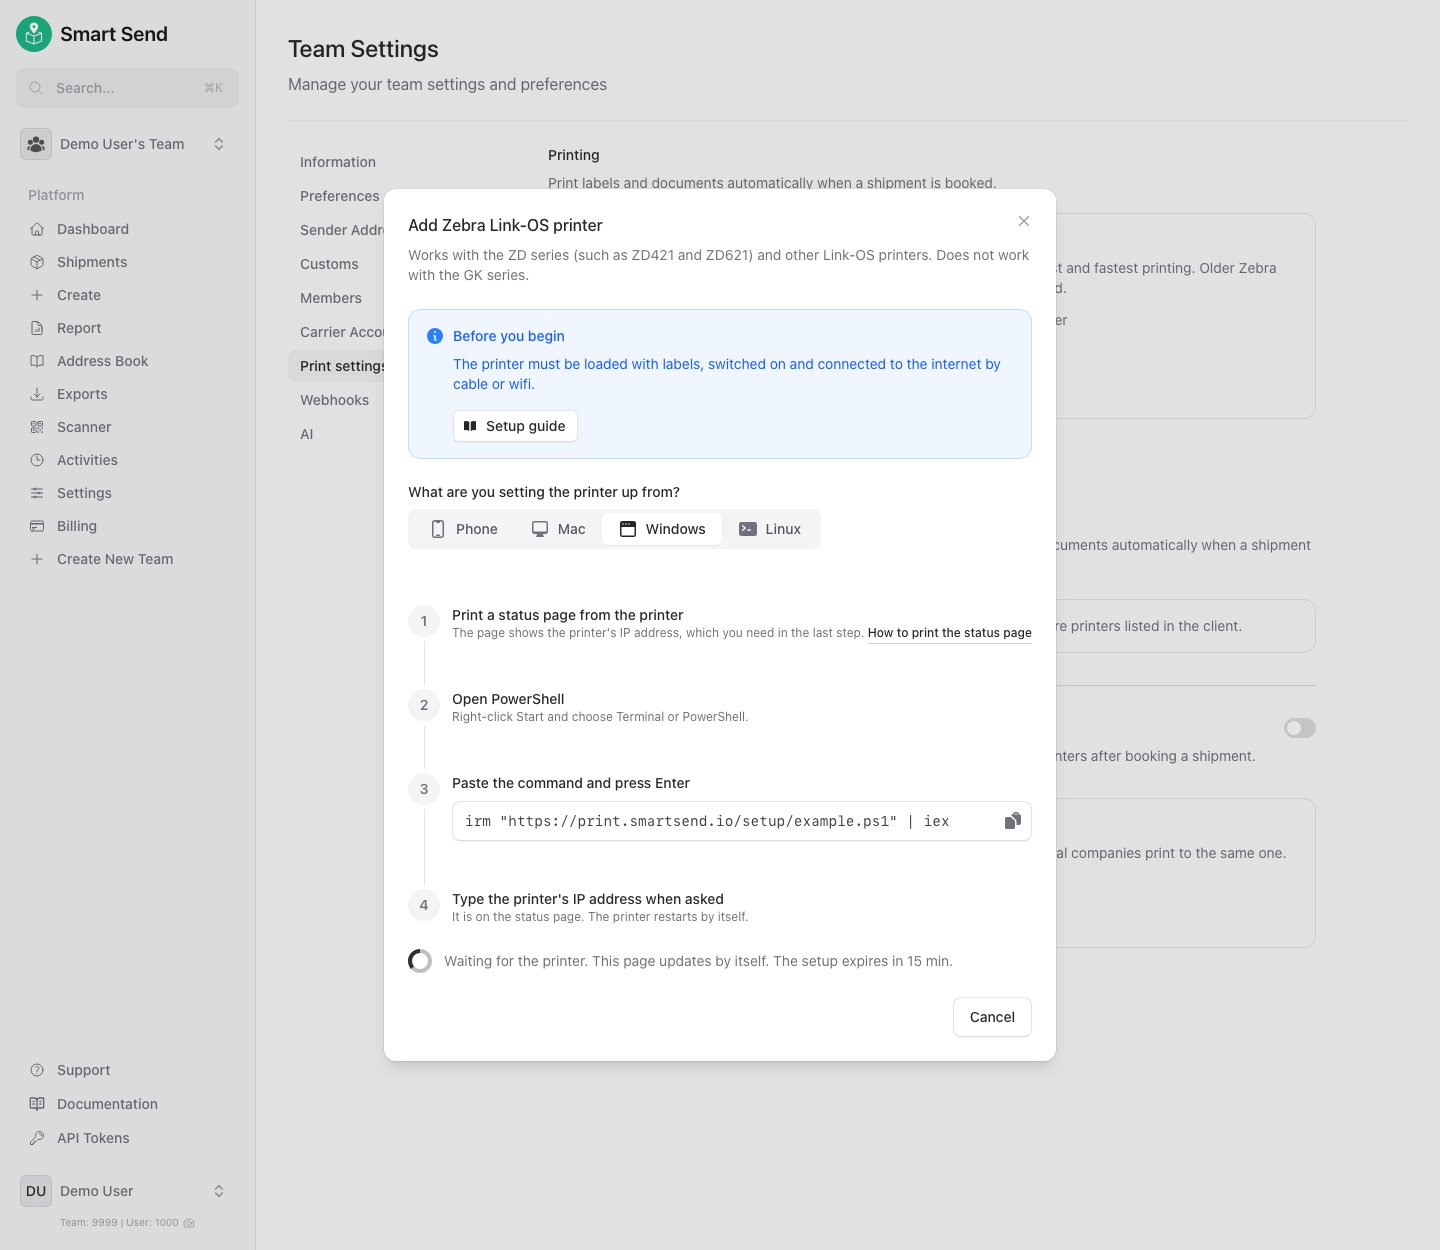
Choose what you set the printer up from.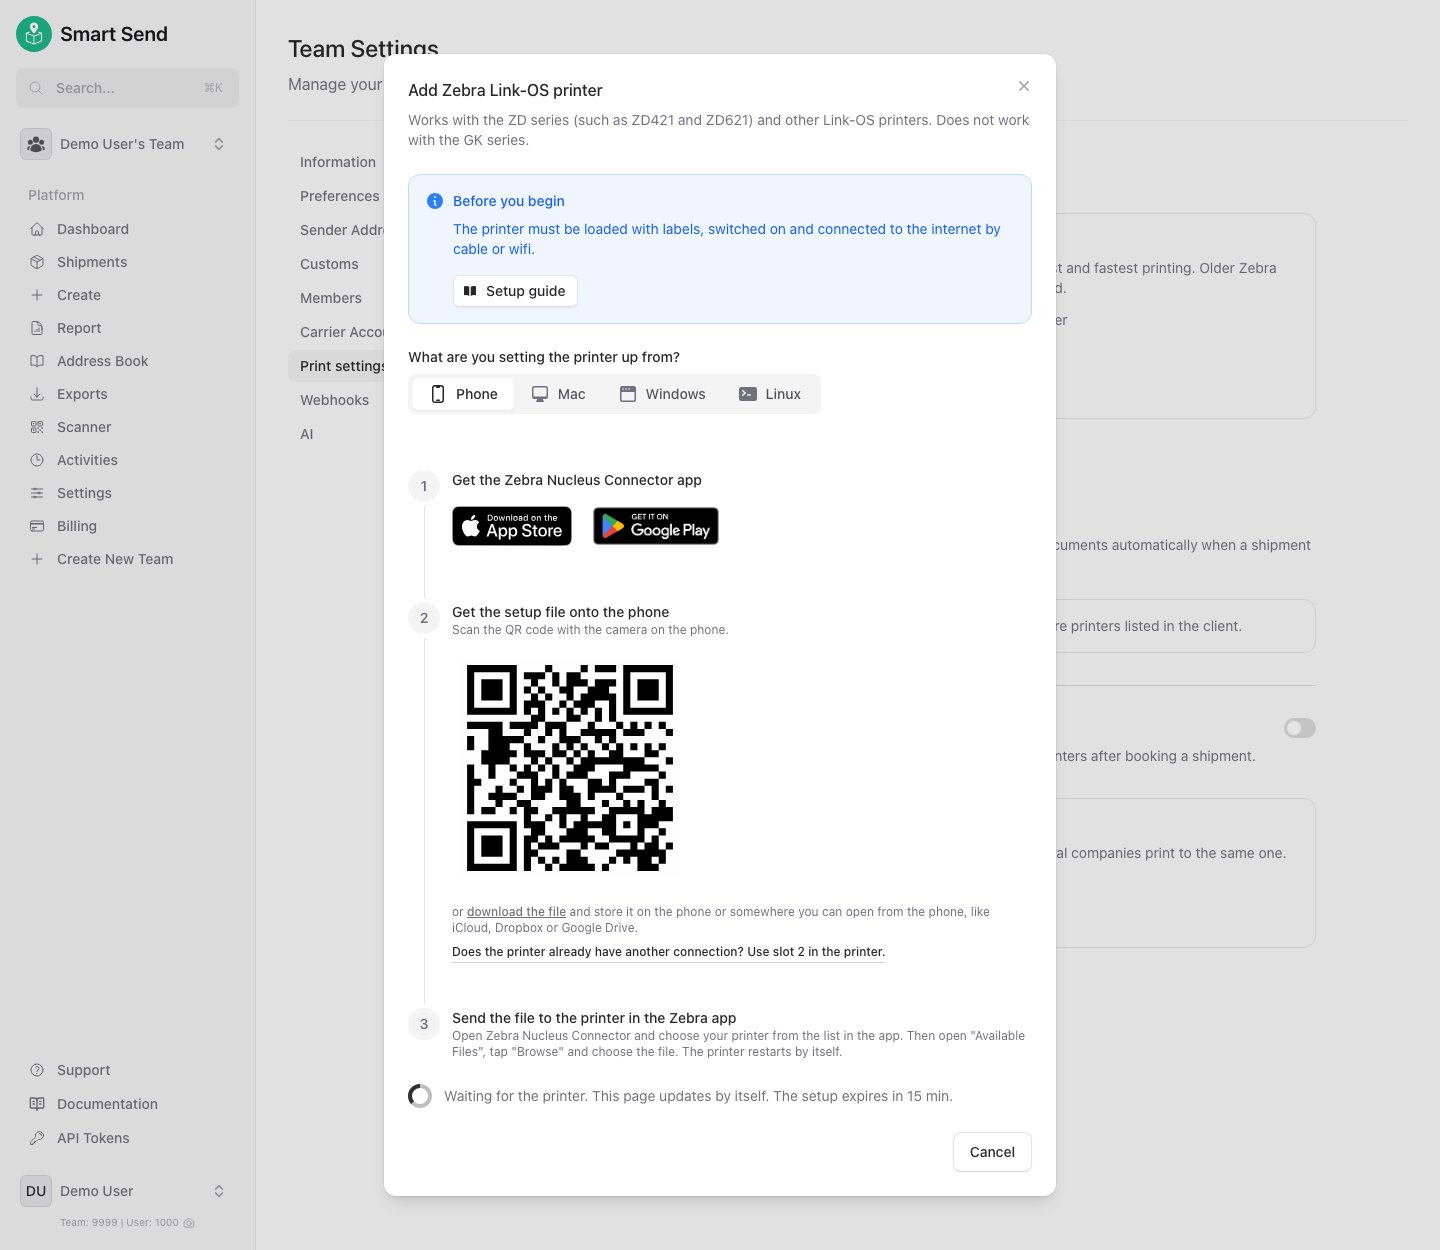
- Phone
- Mac
- Windows
- Linux
- Install the Zebra Nucleus Connector app from the App Store or Google Play .
- Scan the QR code in the dialog with the camera on the phone to get the setup file. You can also click download the file and store it somewhere you can open from the phone, such as iCloud, Dropbox or Google Drive.
- Open Zebra Nucleus Connector and choose your printer from the list in the app. Open Available Files, tap Browse and choose the setup file.
3
Name the printer
When the printer has connected, it prints a welcome label and the dialog shows The printer is connected. Give the printer a name you will recognise, such as where it stands, and click Done. Click Print test label first if you want to check the print.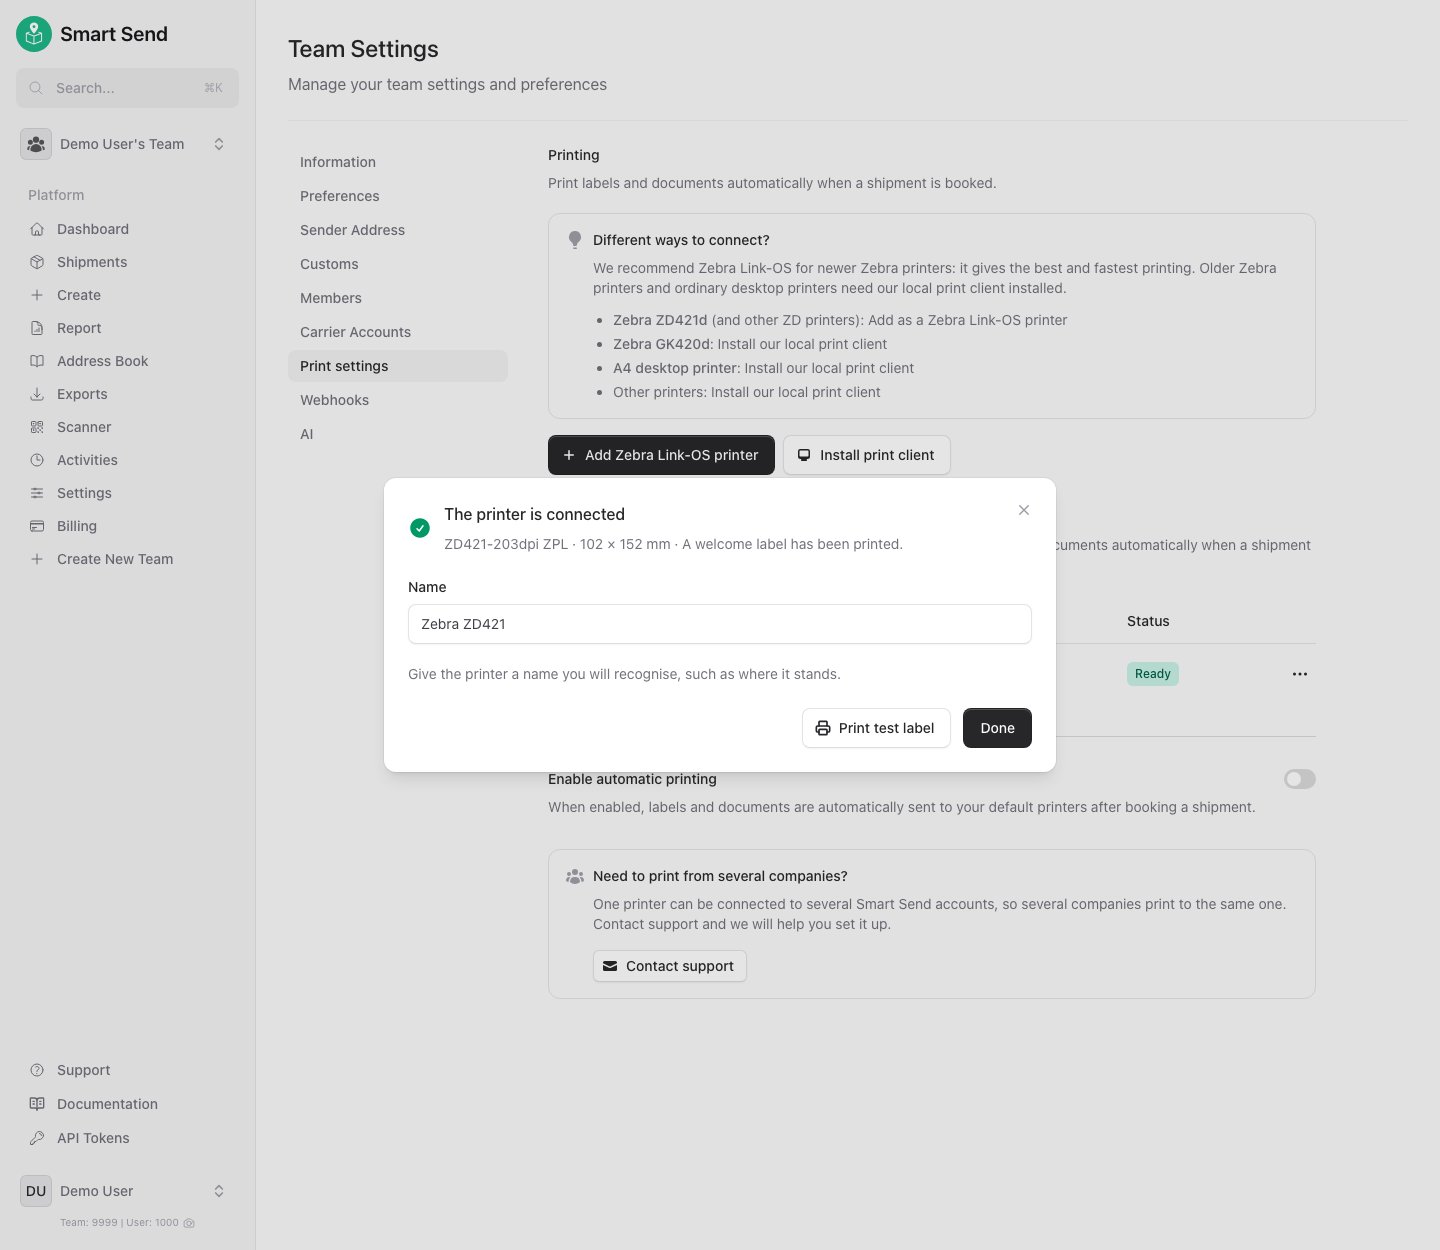
4
Choose it as your default label printer
The printer is now in the list under Printers. Open the menu on the printer’s row and choose Use as default label printer. Turn on Enable automatic printing to have labels printed as soon as a shipment is booked.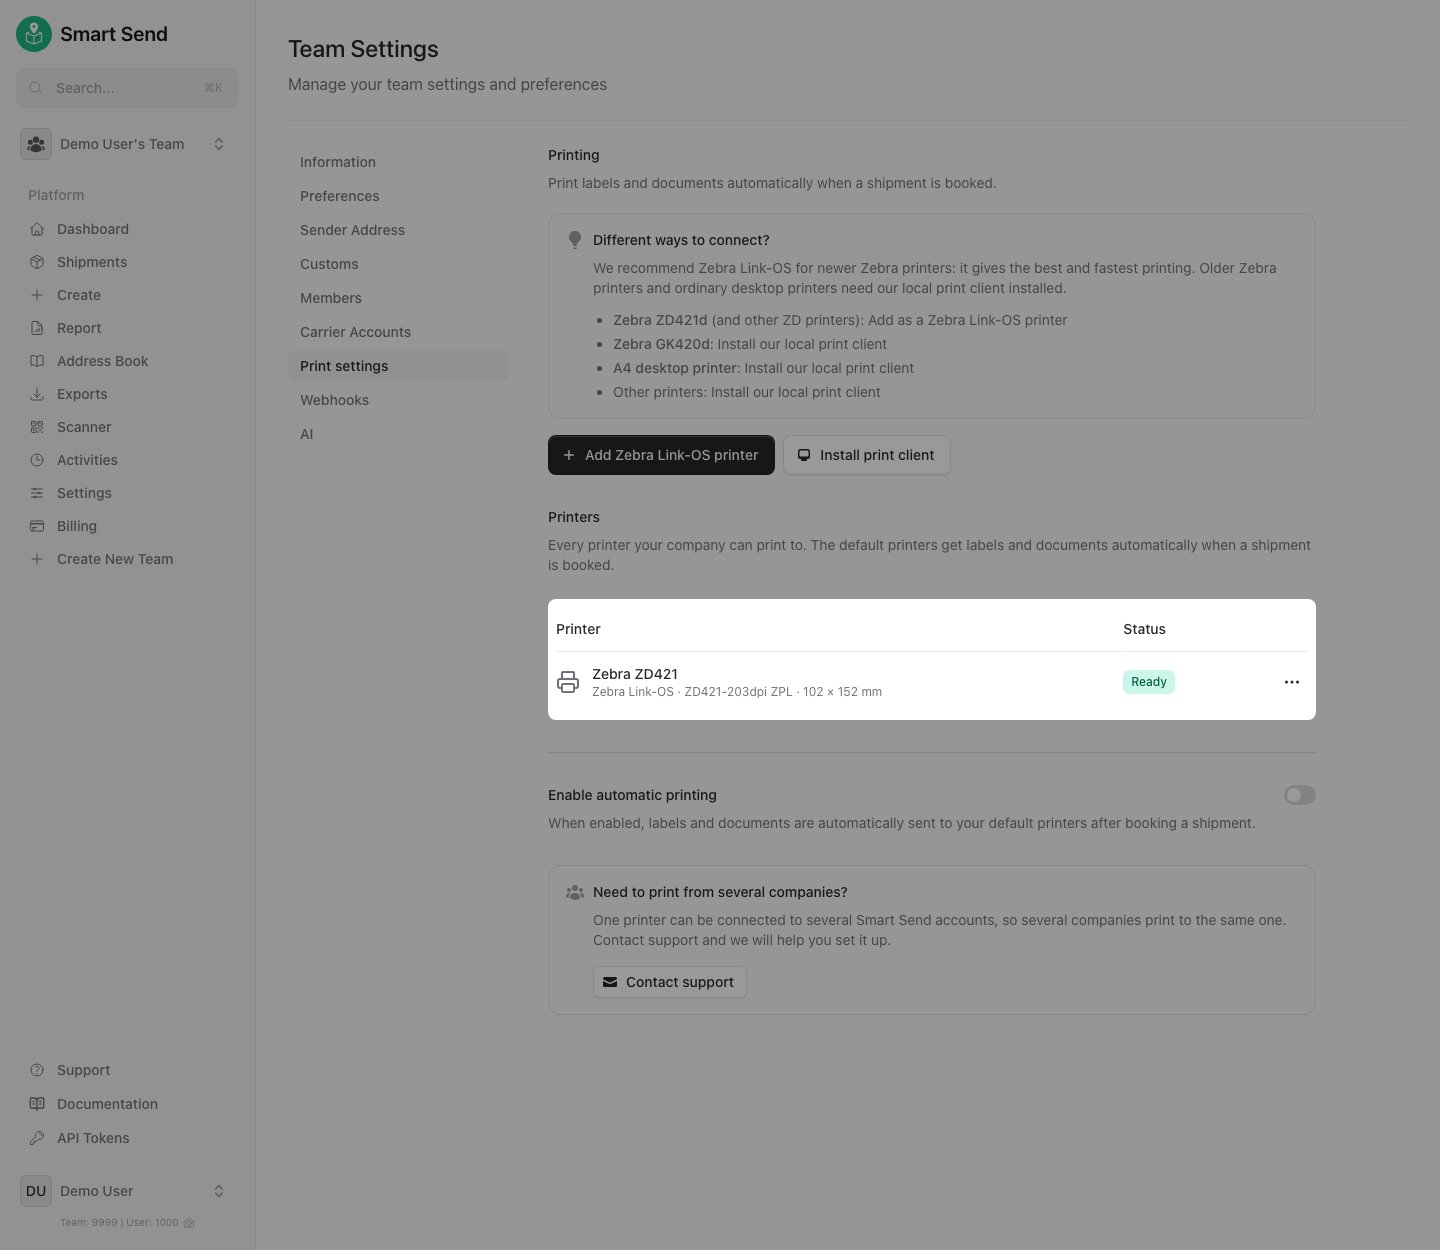
The setup dialog offers a second slot, in case the printer already has another connection. A Link-OS printer can hold two connections of this kind. Use the second slot if the printer is already connected to another system that you want to keep.
Print a status page
The status page shows the printer’s IP address, which you need when you set the printer up from a computer. On the ZD420, ZD421, ZD620 and ZD621, wait until the STATUS indicator is solid green. Press and hold FEED and CANCEL together for two seconds, then release. The printer prints a printer configuration report and a network configuration report. The IP address is on the network report. For other settings you can change from the buttons on the printer, see the Zebra printer setup guide.Printer status
The printer reports its own status, and the Printers list shows it.
A printer that has been switched off connects again by itself when it is switched on. You do not need to set it up again.
Troubleshooting
The dialog shows that the printer was not connected
The dialog shows that the printer was not connected
The setup expired, or was interrupted, before the printer connected. Click Try again and send the new setup to the printer. The file and the command from an earlier attempt no longer work.If it keeps failing, check that the printer is connected to the internet, and that you typed the IP address from the status page correctly.
The printer is offline
The printer is offline
Check that the printer is switched on, and that its network cable is connected or that it is still on your Wi-Fi. Print a status page to see whether the printer has an IP address.
The print is faint or the barcode does not scan
The print is faint or the barcode does not scan
See print quality.