Create a return label from the order’s Smart Send panel, independently or together with its outbound shipment. You need a connected plugin and a carrier account with a service that supports the return route. Review the order’s addresses, items and weights before booking. Creating a return label does not issue a WooCommerce refund. The order’s Return method comes from the return configuration recorded when the order was placed. Use Return method → Edit to choose the service for this booking. To set the service and automatically include return labels by default for future orders, see the automatic return label setting. Changing the zone’s defaults does not rewrite existing orders.

Book only a return label

1

Review the order

Open WooCommerce → Orders, select the order, and find Smart Send. Review the addresses, items and parcel weight.
2

Select the return service

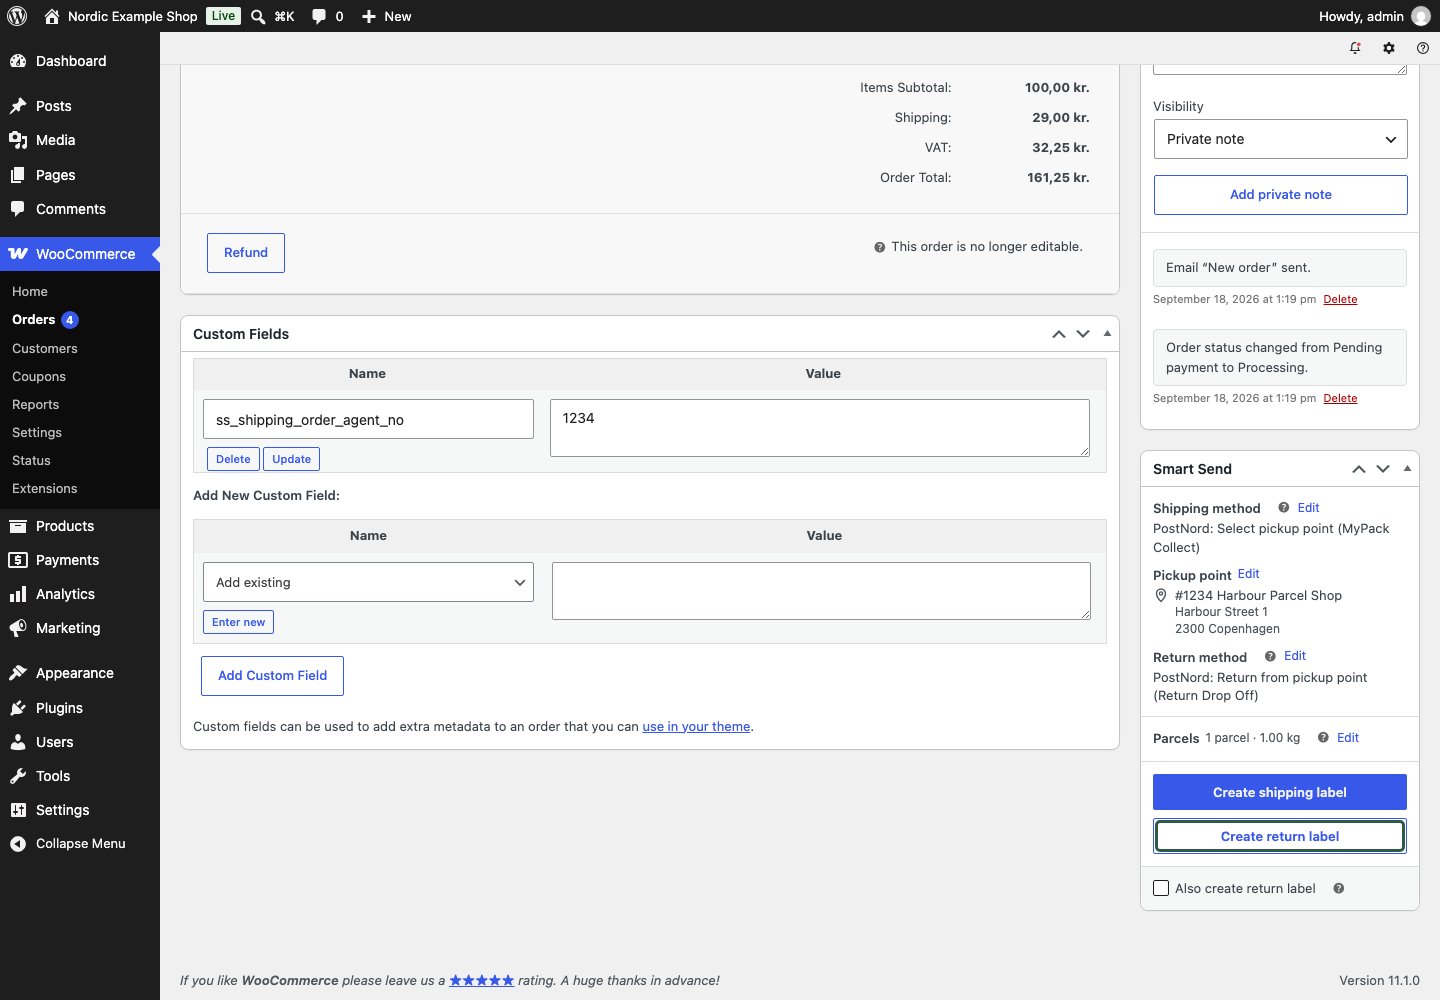
Check Return method. Click Edit to select a suitable return service if it is missing or needs changing.Smart Send order panel with a return service and Create return label button
3

Book the return

Click Create return label. You do not need to book an outbound shipment first or enable Also create return label.
4

Download the return document

Check for the successful Return shipment result and click Download return label (PDF). Supply that document to the customer according to your returns process.
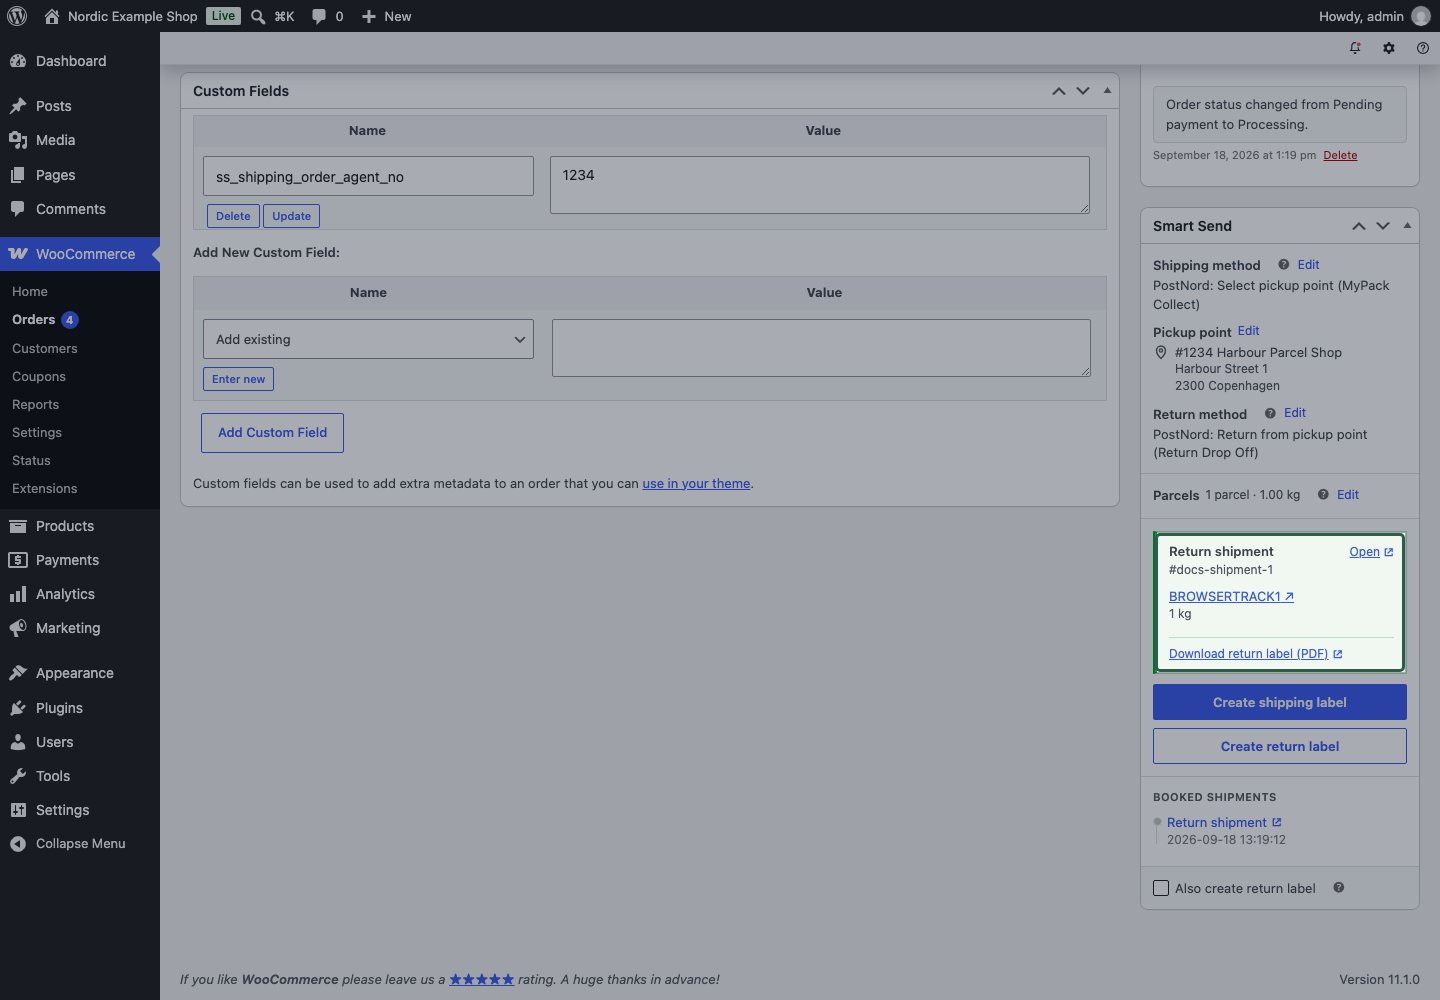
Successful return-only booking with its return document link The order panel uses the order’s items and parcel configuration. The return action is not a selector for returning only selected order-line quantities. Handle refund decisions separately in WooCommerce.

Book outbound and return together

1

Review both services

Check Shipping method, Pickup point where applicable, Return method, and Parcels.
2

Include the return

Check Also create return label, then click Create shipping label.
3

Check both results

The outbound booking runs first. When it succeeds, Smart Send attempts the return. Confirm that both Shipment and Return shipment succeeded, then download each document from its own result.
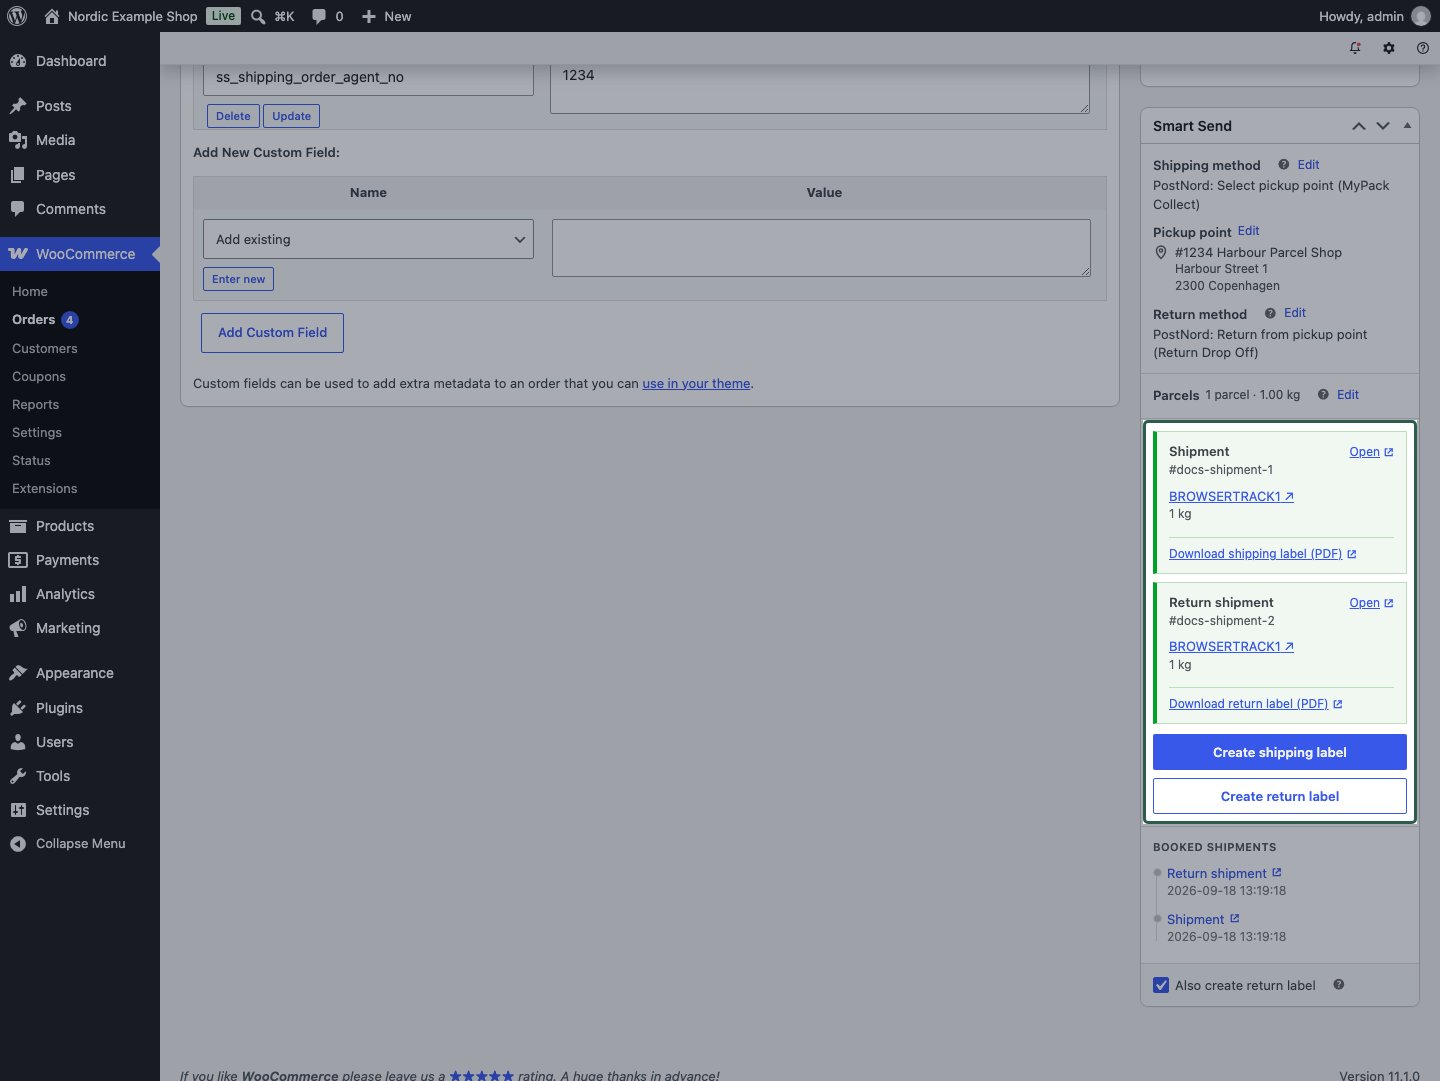
Successful outbound and return bookings with separate document links The outbound and return are separate shipments. Keep their labels distinct when preparing the package. The current parcel allocation and entered measurements are used for both legs in a combined booking.

Find or print the documents again

After a full page reload, open Order notes for the document links, or use Booked shipments to open the shipment in Smart Send. See tracking and booking history. Booking another return requires confirmation when one already exists. Yes, create another creates an additional return shipment; it does not cancel an existing label. For general return-policy considerations, see returns.