Find your question or a setting name below. Open an answer for its explanation, default and relevant examples. For an error, note the message and action; the Smart Send log can help identify the cause.

Where do I find the settings?

Click Save changes after editing. Defaults describe a newly configured screen; review and save the values you intend to use. See add a shipping method if you need to create one first.

Connection and test setup

Location: Global.Default: empty. Open WooCommerce → Settings → Shipping → Smart Send and enter the token in API Token. It connects the shop to your Smart Send account and enables account validation, pickup lookups and booking.Click Save changes before Validate API Token; validation reads the saved value. Follow the connection guide to create and check the token.
Location: Global.This is an action button, not a saved setting. It checks the saved token and displays the result. It does not create a shipment. See connection testing.
  1. Open WooCommerce → Settings → Shipping → Smart Send.
  2. Confirm that the token was copied in full and click Save changes.
  3. Click Validate API Token and read the displayed reason. Replace a token that has been revoked or is invalid.
  4. If the response indicates a connection or server failure, check that the shop can make outbound HTTPS requests and examine the relevant log entry.
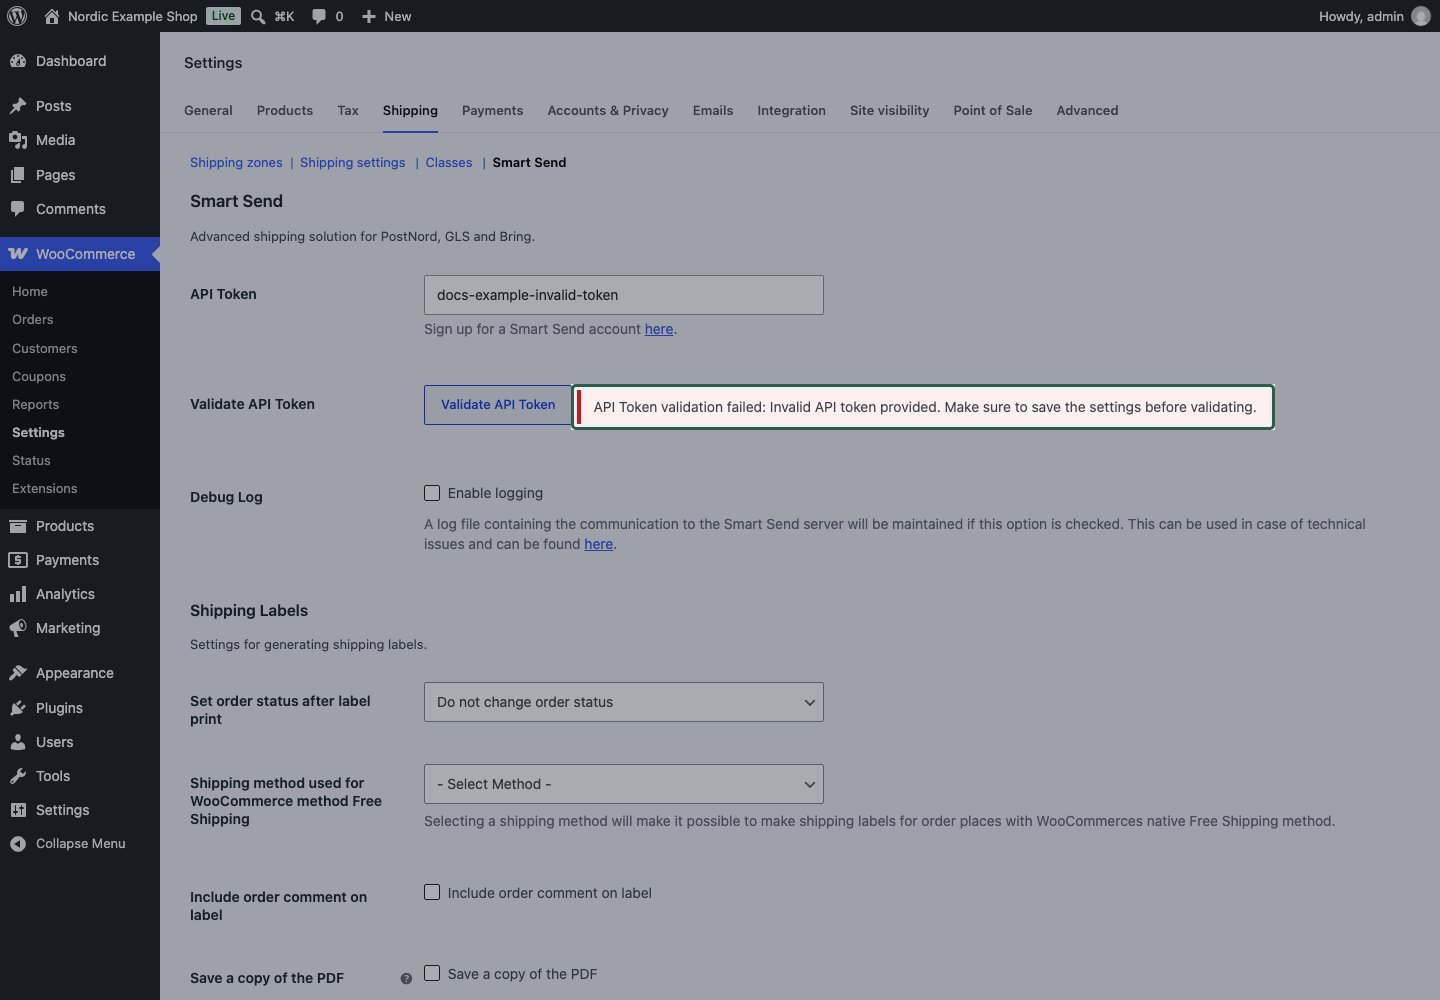
API token validation error asking the merchant to check the token and save settingsA successful validation confirms authentication. If booking still fails, follow booking errors and check the carrier connection. See the complete connection guide.
No. It checks authentication and returns account information. It does not book a shipment or verify all carrier and shipment details. What each test checks.
Test a known cart and address to check methods, prices and pickup selection. Booking from an order is a separate action and creates a real shipment with normal production credentials. A staging shop alone is not a simulated booking environment. Test your setup.

Shipping methods and availability

  1. Check the shipping address and the order of WooCommerce shipping zones. Only the first matching zone supplies methods.
  2. Confirm that the intended method is enabled in that zone and has a Shipping Method service selected.
  3. Compare the cart weight with the configured rows. A 0–5 kg row excludes exactly 5 kg; use the next row for that weight.
  4. Review shipping-class and excluded-role conditions when Advanced Settings is enabled. Test as the same customer type that reported the issue.
  5. If you changed configuration, allow checkout to recalculate with the intended address and cart. WooCommerce’s shipping debug mode can help identify a zone during troubleshooting; it is separate from Smart Send’s Debug Log.
A matched zone without an available method does not borrow methods from another overlapping zone. See configuration examples for known cart/result pairs.
WooCommerce uses the first matching zone from top to bottom. If the Nordic zone includes DK and is above Denmark, a Danish address matches the Nordic zone. Move Denmark above it. Zone order example.
Location: Shipping method.Default: Smart Send. Required customer-facing text, such as Pickup point or Home delivery. It also identifies the method in the zone. The title does not select a carrier service.
Location: Shipping method.Default: - Select Method -. Select the outbound carrier service for this method; a valid service is required when saving. Services are grouped by carrier. The choice controls booking and whether checkout shows a pickup selector. Configure a service your Smart Send account and carrier agreement support for the route.
Location: Global.Default: off; the zone’s method order is used. When enabled, the available shipping rates are sorted from lowest to highest cost plus tax. This applies to the package’s available methods, including methods supplied by WooCommerce or other plugins. It changes display order, not prices, availability or zone matching.For example, pickup at 39 DKK is listed before home delivery at 59 DKK even if the home method is first in the zone.
Check Advanced Settings, the selected shipping-class rule and classes, and Exclude User role. Different class rules treat “any” and “all” cart items differently. Guest visibility must be checked separately from a logged-in role. Class and role examples.
Location: Shipping method.Default: off. Enable it to show and apply shipping-class and excluded-role rules. With it off, those saved advanced rules are ignored. It does not disable weight coverage or pricing conditions. For example, enable it before restricting a method to parcels of a particular shipping class.
Location: Shipping method.Default: N/A. Requires Advanced Settings and at least one selected Shipping classes entry. Only products that need shipping participate.The last label is reproduced as it appears in the interface. For a mixed cart, “all outside” and “at least one outside” give different results; see shipping-class examples.
Location: Shipping method.Default: none selected. Select one or more existing WooCommerce shipping classes for the preceding rule. With none selected, the plugin applies no class restriction. Create classes in WooCommerce and assign them to the products first. Multiple selected classes form one allowed/checked set; a product need not belong to every selected class.
Location: Shipping method.Default: none selected. With Advanced Settings enabled, hide the method from customers with any selected role. Guest means a customer who is not logged in. Selecting Customer does not also exclude guests. Roles are those registered in your WordPress shop, plus Guest.For example, select Guest to require login for this method. Other availability rules still apply after login. See customer-role examples.

Prices, tax and free shipping

Check the selected zone and method before editing the price. Compare entered rates with Tax status and WooCommerce’s cart tax display, then check Cost based on weight.For a threshold, review Minimum order amount, Flat rate requires… and Flat fee cost. A matching rule can replace the price without making an otherwise unavailable method available. See the free-shipping examples.
Check the discounted subtotal on the store’s checkout tax basis, the minimum amount, and whether the rule requires a free-shipping coupon, a minimum amount, either or both. The replacement Flat fee cost must be zero for free shipping; availability restrictions still apply. Worked free-shipping examples.
It depends on WooCommerce’s tax settings and the method’s Tax status. In our examples, a taxable rate of 31.20 DKK before VAT displays as 39 DKK with 25% VAT. Pricing assumptions.
Location: Shipping method.Default: Taxable. Choices are Taxable and None. Taxable lets WooCommerce calculate shipping tax using the shop’s tax settings; it does not create a tax rate. None leaves this method untaxed.Shipping costs are entered excluding tax. Whether checkout displays an inclusive amount follows WooCommerce’s cart/checkout tax-display setting. For example, 31.20 DKK becomes 39.00 DKK with applicable 25% VAT and inclusive display.
With rows 0–5 kg and 5–20 kg, exactly 5 kg matches the second row: lower bounds are inclusive and upper bounds exclusive. Exactly 20 kg requires another matching row. Weight-band example.
Location: Shipping method.Columns: Minimum, Maximum and Cost. The new editor proposes a row from 0 to 20 with a cost of 15; replace it with your intended coverage and price. Bounds use WooCommerce → Settings → Products → Weight unit, not a fixed kg unit.
  • A nonzero minimum is inclusive; a nonzero maximum is exclusive. A 520 row covers 5 kg but not 20 kg in a kg shop.
  • An empty or literal 0 bound is unrestricted on that side. A maximum of 0 does not mean zero-weight products only.
  • If rows overlap, the last matching row with a usable cost determines the price. Avoid overlaps unless that precedence is intentional.
  • A gap means the method is unavailable at that weight, even when a free-shipping condition is met.
  • With no rows, every weight passes the weight check, but a rate is offered only if a flat-fee condition applies. There is no normal row price to use otherwise.
  • A blank cost or literal 0 cost is skipped. Configure free shipping with Flat fee cost = 0 and the appropriate Flat rate requires… rule.
Costs can be a fixed amount or a supported formula. See weight bands and formulas. The calculation uses cart product weight; enter product weights in WooCommerce before testing.
Location: Shipping method.Default: Always disabled. This decides when Flat fee cost replaces the normal weight-row price:An ordinary discount coupon does not satisfy the free-shipping coupon condition. See threshold and coupon examples.
Location: Shipping method.Default: 0. The numeric cost excluding tax used when Flat rate requires… is satisfied. 0 makes this method free; a positive amount gives a fixed replacement price. For example, 15.20 gives 19.00 DKK including 25% VAT. It replaces the weight-row price rather than being added to it.
Location: Shipping method.Default: 0. Used only by a minimum-amount, OR or AND rule. The qualifying amount is the cart’s displayed product subtotal after product discounts, rounded to the store’s price decimals. It excludes shipping.When cart prices display including tax, the calculation includes product tax and subtracts both the discount and its tax. With excluding tax display, it uses the subtotal and discount excluding tax. A threshold is therefore not unconditionally VAT-inclusive, even though the field’s help text mentions VAT. Example: a 500 DKK inclusive subtotal with a 10% product discount qualifies at 450 DKK, so a 500 DKK minimum is not met.
Location: Global.Default: no service selected. Choose the Smart Send carrier service to use when booking an order that used WooCommerce’s native Free Shipping method. This maps the booking service; WooCommerce still decides when its free-shipping checkout method is available.For example, map native Free Shipping to PostNord: Private delivery to address (MyPack Home). See the complete example. This mapping does not add Smart Send’s pickup selector to a native method.

Pickup point delivery

Choose a service that supports customer-selected pickup points. The customer selects a point in checkout. Select Default controls automatic initial selection; it does not create a map or choose a service. Classic and block checkout instructions.
Use a service that supports customer-selected pickup points. After changing the shipping address or carrier, wait for the new lookup and select a compatible point again if requested.An empty result or failed lookup can allow checkout to continue without saving a pickup point. Review such an order before booking and select or correct the pickup details in its Smart Send panel. An explicitly invalid or stale selection can instead be rejected and must be corrected. See pickup results and address changes.
Location: Global.Default: off. Enable Select Default preselects the closest point returned by the pickup lookup. Customers can change it. With the setting off, customers must make a choice when points are available. It requires a customer-selection pickup service; it does not select a shipping method for the customer. See selection and fallback behavior.

Booking, labels and customs

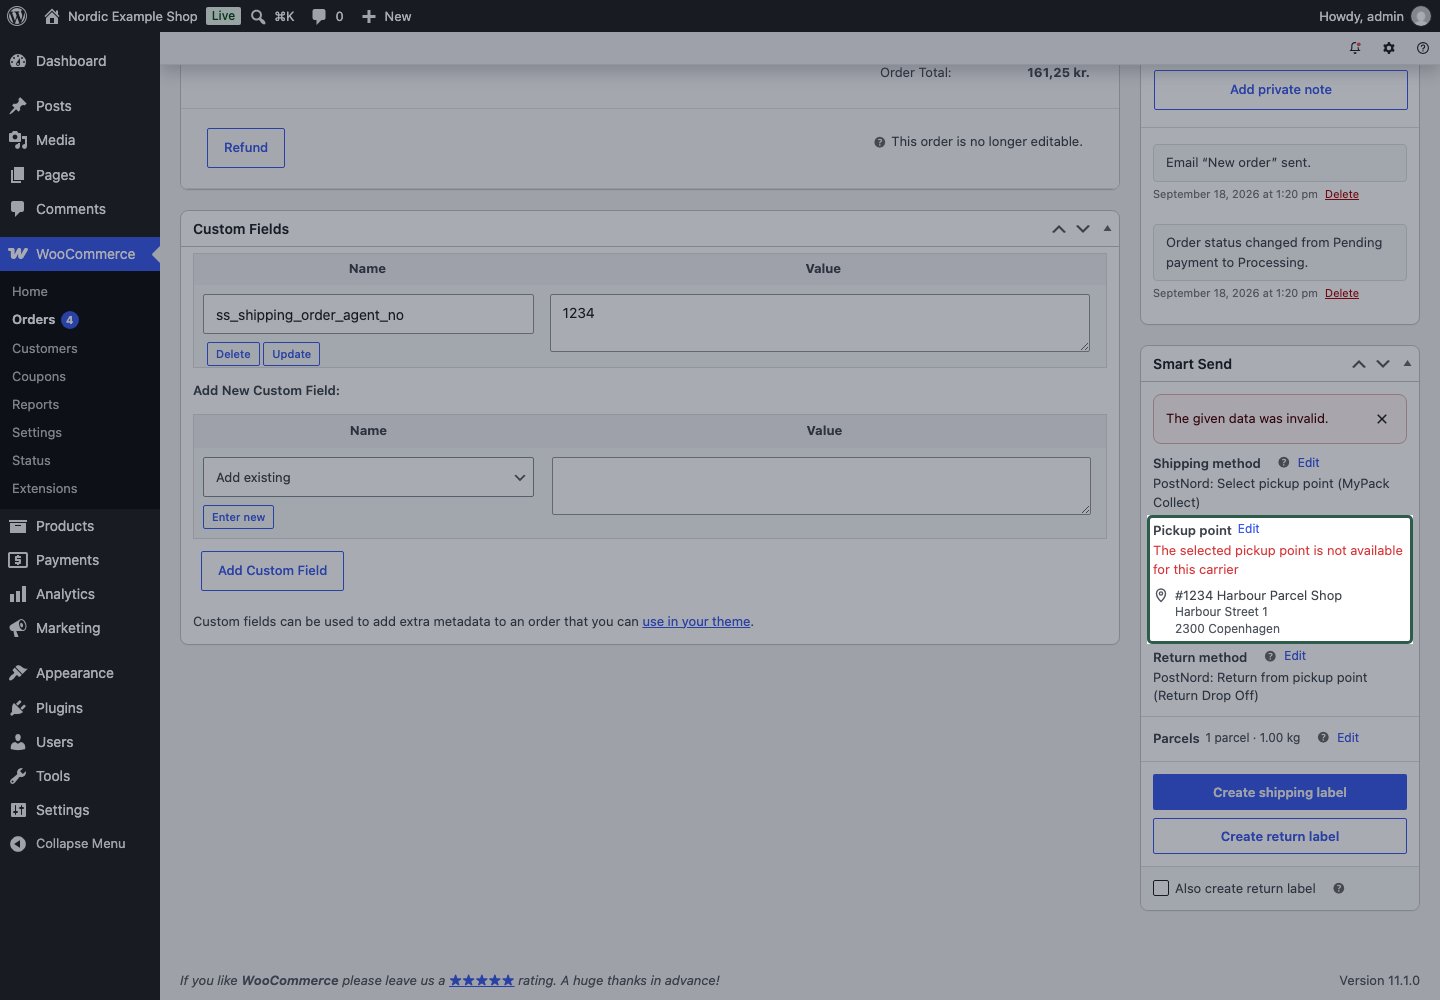
Read the message next to the affected field and correct the order or booking details before retrying. Check the selected service, recipient address, required contact details and pickup point. Verify the carrier connection for that service.Booking validation message next to the pickup point field in the Smart Send order panelFor missing weight, enter a usable product weight or the appropriate explicit parcel weight including packaging. For several colli, all order quantities must be allocated correctly. Follow Colli shipments for allocation and measurement validation.If the outcome is uncertain, inspect the existing booking history before retrying: another booking can create another shipment. A failed document-copy step is not the same as a failed booking.
Open the order’s existing Smart Send booking and use its document link. Downloading or printing that document is different from booking another shipment. Retrieve labels.
Open the successful booking in the order’s Smart Send history and use its document link. A warning that the label was booked but its local copy could not be saved confirms that the shipment is booked. Use the original document link and ask your administrator to investigate uploads-directory permissions or the download error in the log. Do not book again to recover the PDF. See labels and documents.
Location: Global.Default: off. When enabled, the plugin attempts to save a local copy of the generated PDF in WordPress’s uploads folder. The uploads location must be writable. Use the missing-PDF checks if copying fails; a failed copy does not mean the booking failed.
The Smart Send panel updates after booking. WooCommerce’s order-note area uses the native order-note API and may need a full page reload to show the new note. Booking history and notes.
Location: Global.Default: Do not change order status. Choose that option or one of the shop’s registered WooCommerce order statuses. The setting changes the order status after a successful outbound booking; it does not wait for paper to emerge from a printer. Return-only booking does not apply this outbound status change.For example, select Completed only if an outbound booking is the point at which you want to complete the order. WooCommerce’s own status-change behavior, including configured emails, still applies.
Location: Global.Default: off. When enabled, the customer’s order comment is supplied with the shipment’s label-comment information. Its use on the resulting label depends on the carrier service. Use it for relevant delivery instructions, and review the customer’s text before booking.
Edit the product under Products → Product data → Shipping. Fill in Country of origin, Customs description, and Harmonized Tariff Schedule (HS code), then update the product. Product customs guide.
Use the advanced parcel controls to allocate the order’s quantities across colli and check each colli’s weight and dimensions. Colli shipments explains the full process and validation.
Bulk printing is coming. The current guide covers booking and retrieving labels for one order at a time. Book a shipping label.

Return labels

Configure a valid return service, open the order and click Create return label. A return can be booked independently of an outbound shipment. Return booking.
Keep the successful outbound booking. Correct the return error and click Create return label to retry only the return. Booking both again can create another outbound shipment. Partial-success recovery.
Location: Shipping method.Default: no service selected. Choose a return service supported by the carrier/account. It supplies the return service recorded on new orders and does not create a separate checkout option or change the checkout price. Changing this default does not replace the service recorded on existing orders. Follow Book return shipping for return-only and combined bookings.
Location: Shipping method.Default: off. When enabled alongside a valid Return Shipping Method, the method records the return preference on new orders and preselects Also create return label in the booking panel. It does not book a shipment when the customer places the order. The return is attempted after you successfully book the outbound shipment.Changing the default does not update existing orders. Review the return choice in the booking panel before booking. Creating a return label is separate from refunding a WooCommerce payment. See return booking and recovery.

Logs, support and customizations

1

Open WooCommerce logs

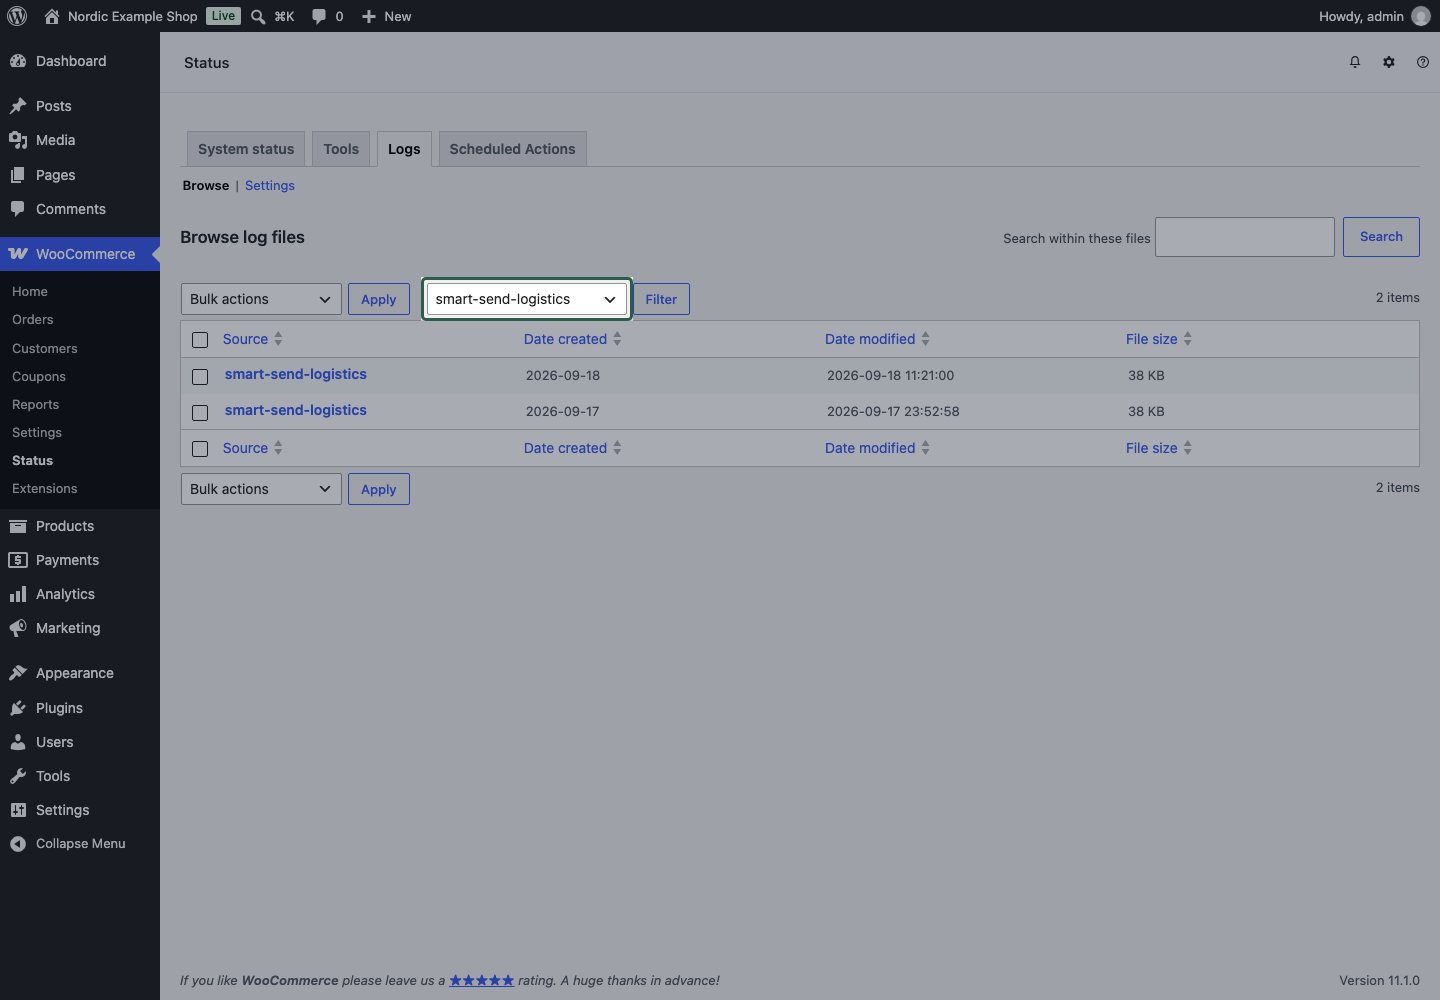
Go to WooCommerce → Status → Logs and filter the source to smart-send-logistics.WooCommerce Logs filtered to the smart-send-logistics source
2

Find the matching time

Open the relevant log and locate the time of the failed action. Compare the message, HTTP status and any request identifier with the error you saw.
3

Enable details if needed

Enable Debug Log in WooCommerce → Settings → Shipping → Smart Send, save and reproduce the issue once. Turn it off after collecting the required details. Warnings and errors can still be logged when debug logging is off.
Location: Global.Default: off. Enable logging records diagnostic Smart Send communication and shipping decisions in the WooCommerce logs. Use the field’s log link or WooCommerce → Status → Logs. Enable it while investigating a problem, reproduce the problem, then review the relevant entries.This is separate from WooCommerce’s Shipping debug mode, which bypasses shipping-rate caching and enables checkout diagnostics. See logging and support information. Do not share API tokens or customer details in public support reports.
Send the plugin, WooCommerce and WordPress versions; checkout type; exact error and time; affected action; and relevant settings or cart values. Include a short log excerpt when it explains the problem. Remove tokens and unnecessary customer names, addresses and contact details before sharing screenshots or logs.Contact Smart Send support with those details. Do not send a full API token.
Developer reference brings together filters and actions with contracts and examples, plugin metadata, and PHP APIs for reading an order’s pickup point, shipping methods and bookings. Put customizations in your own plugin so updating Smart Send does not overwrite them.